2413 Lanvale- Drywall
It's been a while since the last post, and the house really looks good. The majority of the last two weeks was spent preparing the walls for drywall. The house had lathe and plaster walls that were covered with a paper material at some point over the last 9 decades. The paper is a huge problem because when you put paint over it, it starts to swell. We tried pulling off the old paper, but this took way too much time, and still left us with plaster walls that had to be patched and sanded, which takes even more time. We ended up drywalling the entire house (180+ sheets).
Here's a summary of how the process went for pretty much each room in the house. We first had to frame out the ceilings and walls. This is the rear bedroom/office that used to be the second kitchen when the house was a duplex. After the studs were up, we had to wait for the electrician to come and rough-in the new outlets. After this passed inspection, we started covering up the walls with the new sheetrock.
Here's what the room looks like after the drywall is first put up:
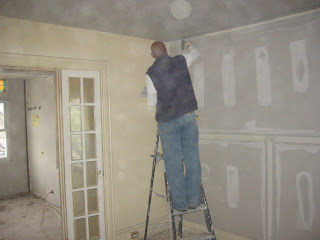
After the drywall is hung, the guys use compound and tape to smooth the cracks and holes around the screws.
Elsewhere in the house, two guys worked on tiling the kitchens and bath. The kitchen floor wasn't entirely level, so we used cement leveler before laying the tile:
The weather was finally clear enough to paint the rear wall. This proved to be more difficult than we had anticipated because there were layers and layers of paint on the brick. We used a wire brush to clean it and then used several coats of exterior paint:


0 Comments:
Post a Comment
Subscribe to Post Comments [Atom]
<< Home